I ruined my first brisket completely. Fourteen hours of smoke, an expensive cut of meat, and what came off the pellet grill was dry, tough, and gray all the way through. I had read three YouTube comments and figured I had it handled. I did not. The problem was not the grill. The problem was that nobody had walked me through the actual steps in plain language, in the right order, without assuming I already knew what "the stall" meant or why you trim fat to a quarter inch instead of just leaving it alone. That is what this guide is. Five steps, no gatekeeping, and a real explanation of every decision. If you have a pellet grill, a whole packer brisket, and a free Saturday, you can do this.
A pellet grill is genuinely the best starting point for a first brisket. It holds temperature automatically, feeds fuel on its own, and lets you walk away for stretches without babysitting the fire. The Traeger Pro 34 is the tool I use for this cook. It has 884 square inches of cooking space, which is enough room for a full packer brisket without bending it awkwardly on the grates, and its digital controller keeps the temperature dialed within a tight range so you are not chasing swings all day. If you have been thinking about trying a long cook like this, the pellet grill is the setup that actually makes it approachable.
Brisket is unforgiving on a grill that can not hold temperature. The Traeger Pro 34 eliminates that problem.
The Pro 34 uses a digital controller to maintain your set temperature automatically, so you can focus on the meat instead of the fire. It holds a full packer brisket flat on its 884 square inches of grate space and runs on hardwood pellets that give you consistent smoke from start to finish. Check today's price and see if it is still in stock.
Amazon Check Today's Price on Amazon →Step 1: Choose and Trim Your Brisket
Start with a whole packer brisket, which means it still has both the flat and the point attached. You want somewhere between 12 and 15 pounds for a manageable first cook. Look for a USDA Choice or Prime grade with good marbling running through the flat, since that fat is what keeps the meat moist over a long smoke. Avoid anything labeled "brisket flat only" for this cook. The point section provides fat and connective tissue that baste the flat as they render down, and you will miss that insurance on your first attempt.
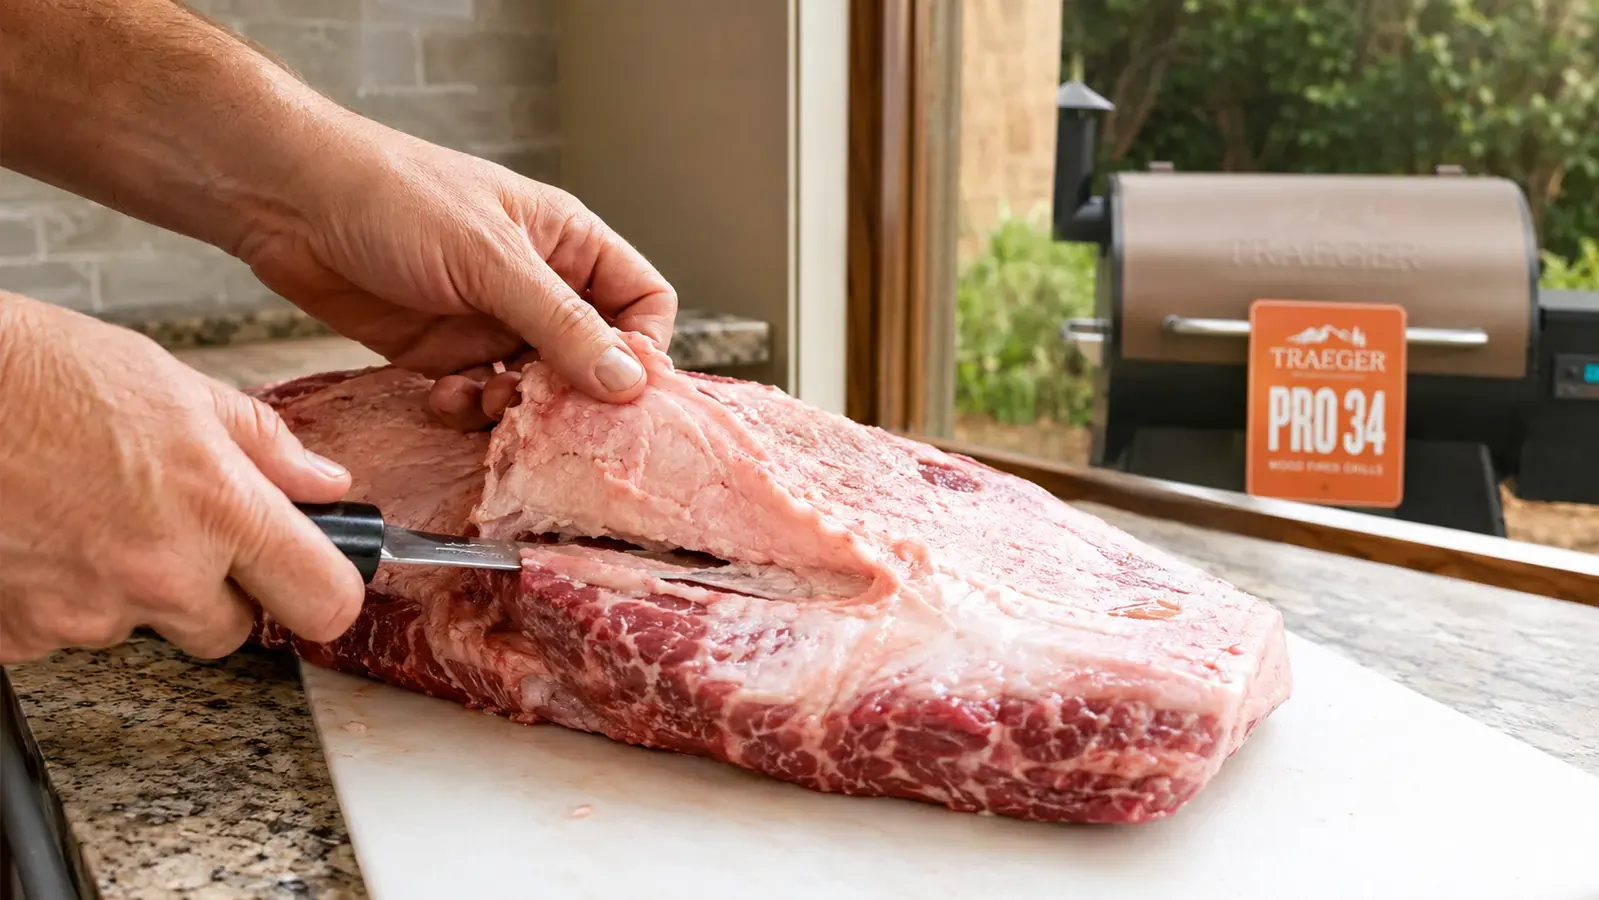
Trimming feels intimidating but it matters. Flip the brisket fat side up and use a sharp boning knife to level the fat cap to roughly a quarter inch. If you leave it thicker, the fat will never render and you end up with a waxy layer on top of the meat. If you trim it all the way down, you lose the moisture protection. A quarter inch is the target. On the underside, remove any hard white fat that does not have connective tissue running through it. That type of fat will not render at smoking temperatures. It just sits there. Spend 10 minutes on the trim and you will not regret it.
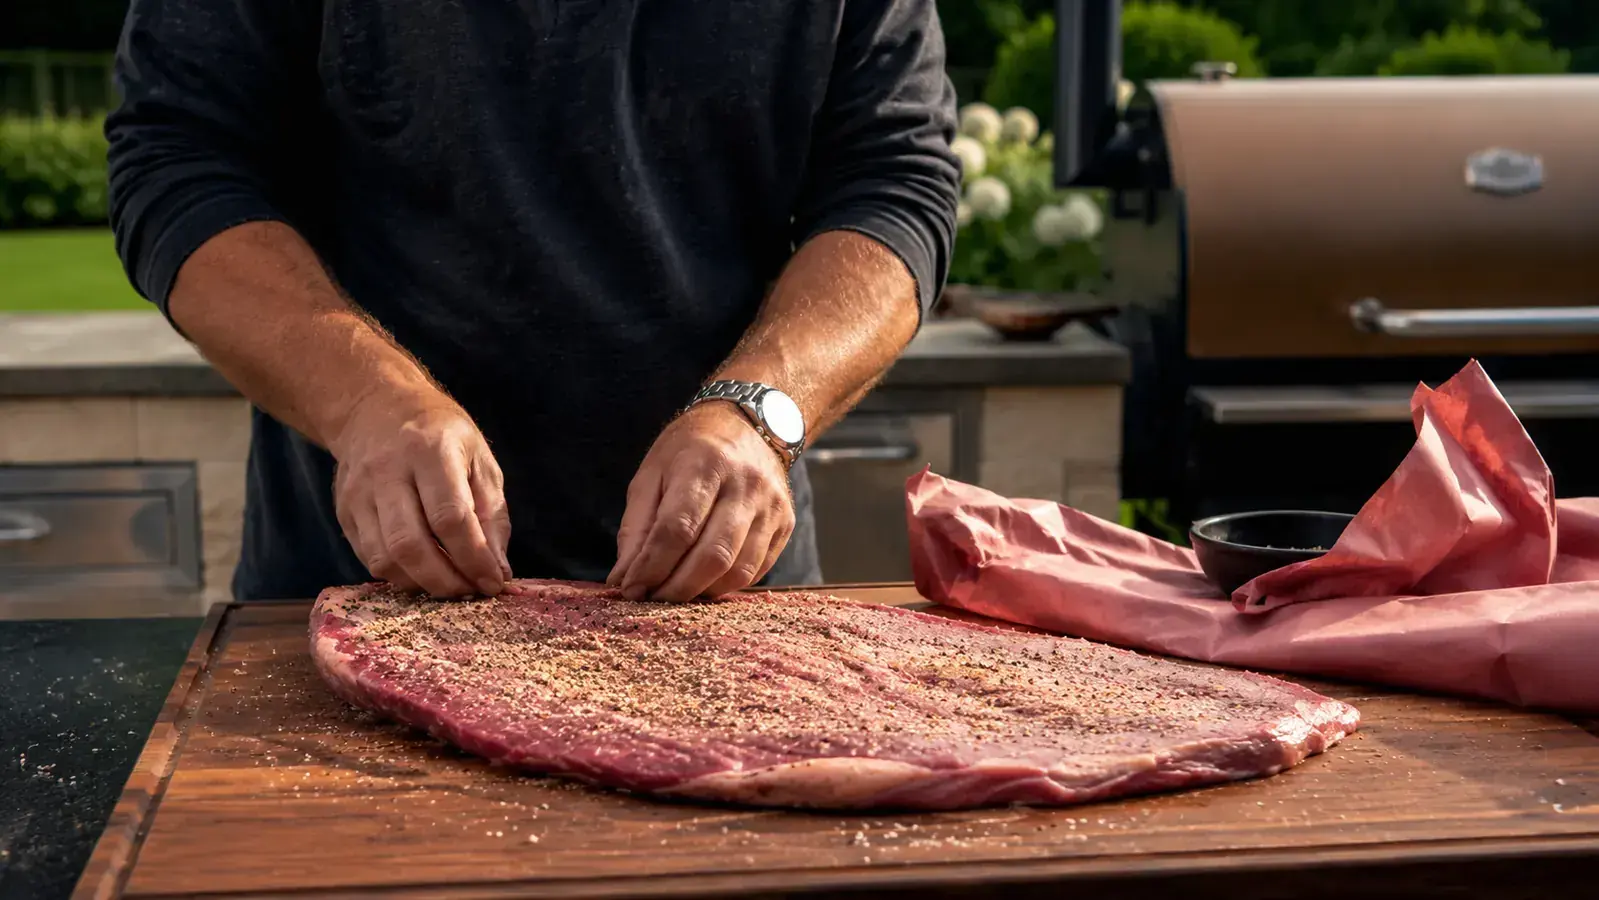
Once the brisket is trimmed, season it generously with a simple rub. The classic is equal parts coarse kosher salt and coarse black pepper, sometimes called a Texas-style rub. Cover every surface, including the sides. You are not being subtle here. The rub builds the bark, which is the dark, flavorful crust you see on a properly smoked brisket. Some cooks add garlic powder or a little paprika. Those are fine additions but the salt and pepper alone will get you a beautiful result. Let the seasoned brisket sit uncovered in the refrigerator for at least one hour, or up to overnight if you have the time.
Step 2: Set Up Your Pellet Grill and Choose Your Wood
Fill your hopper with hardwood pellets before you start. For brisket, you want a bold smoke flavor that complements beef without fighting it. Post oak is the traditional Texas choice and is hard to beat. Hickory is another excellent option with a slightly stronger profile. Cherry adds a subtle sweetness and gives the bark a darker, more reddish color. Avoid fruit woods like apple or peach for brisket. They work well on pork, but they tend to produce a lighter smoke that gets lost on beef over a 12 to 14 hour cook. On the Traeger Pro 34, a full hopper holds roughly 18 pounds of pellets, which is enough to carry you through a long brisket cook without needing to refill mid-smoke.
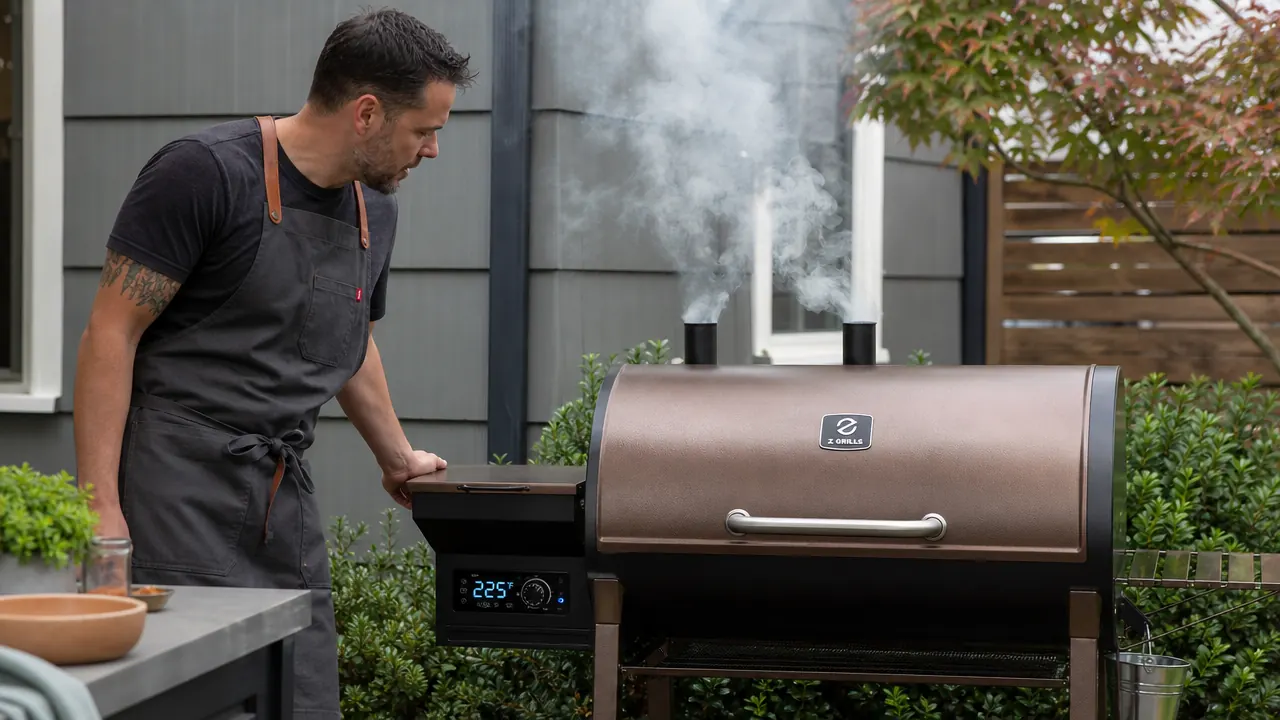
Set your grill to 225 degrees Fahrenheit. This is the standard starting temperature for low-and-slow brisket. It is low enough that the connective tissue has time to break down properly, turning from tough collagen into gelatin that makes the meat pull apart easily. Give the grill about 15 minutes to come up to temperature and stabilize before you put the meat on. On a pellet grill, you will see the temperature settle quickly once it climbs. That stability is one of the major advantages of this style of cooker.

Step 3: Place the Brisket and Start the Smoke
Place the brisket on the grill fat side up. There is debate in the BBQ world about fat side up versus fat side down, but for a pellet grill where the heat source comes from below, fat side up makes more sense. The rendering fat drips down through the meat rather than pooling underneath and burning. Slide the brisket so the point end faces toward the back of the grill, where temperatures tend to run slightly hotter. This helps the thicker section cook in line with the thinner flat.
Insert a leave-in probe thermometer into the thickest part of the flat, not the point. The flat is the section that needs the most attention because it has less fat and will dry out first if you push the temperature too hard. Close the lid and walk away. You do not need to open the grill for the first three to four hours. Every time you lift the lid, you lose heat and smoke, and you add time to the cook. Trust the process. The pellet grill is doing its job.
Every time you lift the lid in the first four hours, you are adding time and losing smoke. The brisket does not need your help yet. Close the lid and let it work.
Step 4: Handle the Stall Without Panicking
Around 150 to 165 degrees Fahrenheit, your brisket will stop climbing in temperature. It might hold there for two, three, or even four hours. This is called the stall, and it is the moment that causes most first-time brisket cooks to either panic and crank the heat or just give up and call the brisket done. Neither is the right move. The stall happens because moisture evaporating from the surface of the meat is cooling it at the same rate the grill is heating it. The temperature will start climbing again on its own once enough surface moisture has evaporated.
You have two options when you hit the stall. You can wait it out, which preserves the most bark development and gives you the most smoke absorption. Or you can use the Texas Crutch: pull the brisket off the grill, wrap it tightly in two layers of heavy-duty aluminum foil or butcher paper, and return it to the grill. Foil speeds through the stall faster and produces a more tender, slightly softer bark. Butcher paper is a middle ground that speeds things up while letting the bark breathe a little more. For a first brisket, butcher paper is a forgiving choice. Wrap it around 165 degrees, return it to the grill, and let it ride.
If you are using the Traeger Pro 34, this is also a good moment to bump the temperature up to 250 degrees if you are running behind schedule. The extra 25 degrees will push the brisket through the stall zone faster without sacrificing the final texture, especially once it is wrapped.
Step 5: Check Doneness and Rest the Brisket
Pull the brisket when the internal temperature in the thickest part of the flat reaches 200 to 205 degrees Fahrenheit. But temperature alone is not the full story. The real test is what pitmasters call the probe test. Take an instant-read thermometer, a skewer, or even a toothpick and poke it into several spots across both the flat and the point. It should slide in with almost no resistance, like you are pushing it through soft butter. If you feel any firmness or drag, give it another hour and check again. A brisket that probes firm but reads 205 is not done yet. A brisket that probes like butter at 200 is ready.
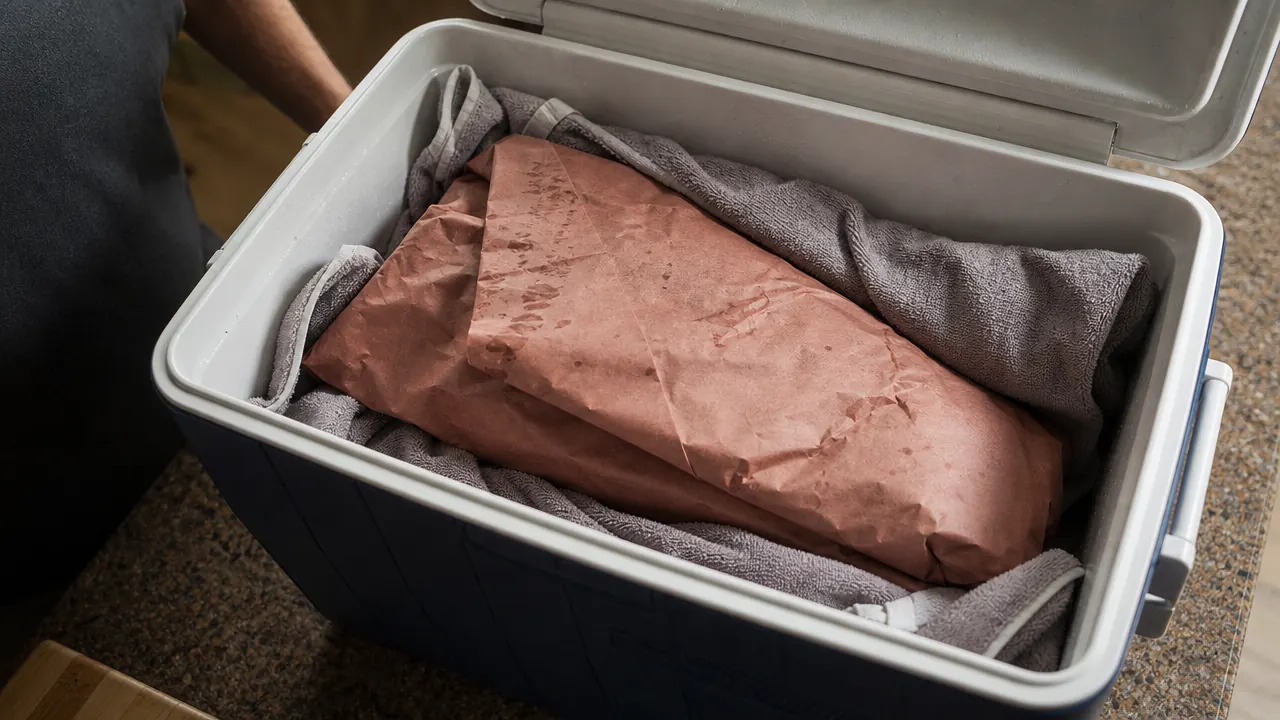
Once it probes right, pull it off the grill and do not cut it yet. This is the step most impatient cooks skip and it costs them everything. Wrap the brisket in a fresh layer of butcher paper or foil, then wrap that in a thick towel, and set it in a dry cooler for at least one hour. Two hours is better. This rest period allows the muscle fibers to relax and reabsorb the juices that tightened up during the long cook. If you slice immediately, those juices run out onto the cutting board instead of staying in the meat. A properly rested brisket will still be hot after two hours and it will be dramatically more moist than one sliced straight off the grill.
When you are ready to slice, cut across the grain. The flat runs one direction and the point runs at an angle to it, so you will need to reorient your knife partway through. Cut slices about the thickness of a pencil. Too thin and they fall apart. Too thick and they are hard to chew. Start from the flat end and work your way toward the point. The point slices will be fattier and more tender, and some cooks cube the point separately into pieces called burnt ends. That is a bonus cook worth exploring once you have the main brisket down.
What Else Helps on a Long Cook Like This
A few things will improve your result without adding complexity. A digital instant-read thermometer is non-negotiable. A leave-in probe thermometer that pairs with your phone saves you from hovering over the grill. If your pellet grill does not have one built in, a separate wireless probe is worth the small investment. Good butcher paper costs almost nothing and makes wrapping easier than foil. And a large cooler you are not actually cooling anything in is the simplest way to hold a brisket at serving temperature for up to four hours while you wait for guests to arrive. None of this is complicated equipment. Most of it you probably already have.
The most important variable on a long cook is a pellet grill that holds its temperature reliably. If your grill swings 30 or 40 degrees in either direction, you are fighting the grill all day instead of focusing on the meat. The Traeger Pro 34 is built to eliminate that problem. Its digital controller and auger system work together to keep the temperature within a consistent range, which means the brisket cooks evenly without you making manual adjustments every hour.
You did the work. Now let a grill that actually holds temperature finish it for you.
The Traeger Pro 34 is the pellet grill I recommend to anyone doing their first long cook. Steady temperature, simple controls, and enough cooking space for a full packer brisket with room to spare. See today's price on Amazon before your next weekend cook.
Amazon See the Traeger Pro 34 on Amazon →